How to Fix Shark IQ Robot Vacuum Error 2 Bumper Stuck
Encountering a Shark IQ Robot Vacuum Error 2 Bumper Stuck Fix notification can be frustrating when your cleaning schedule is interrupted. This specific error indicates that the front bumper is physically jammed or the internal sensors believe it is constantly colliding with an object.
Most users can resolve this issue at home by clearing debris or performing a simple manual reset of the bumper mechanism. In this guide, we will walk through the professional steps to get your robot back to work efficiently.
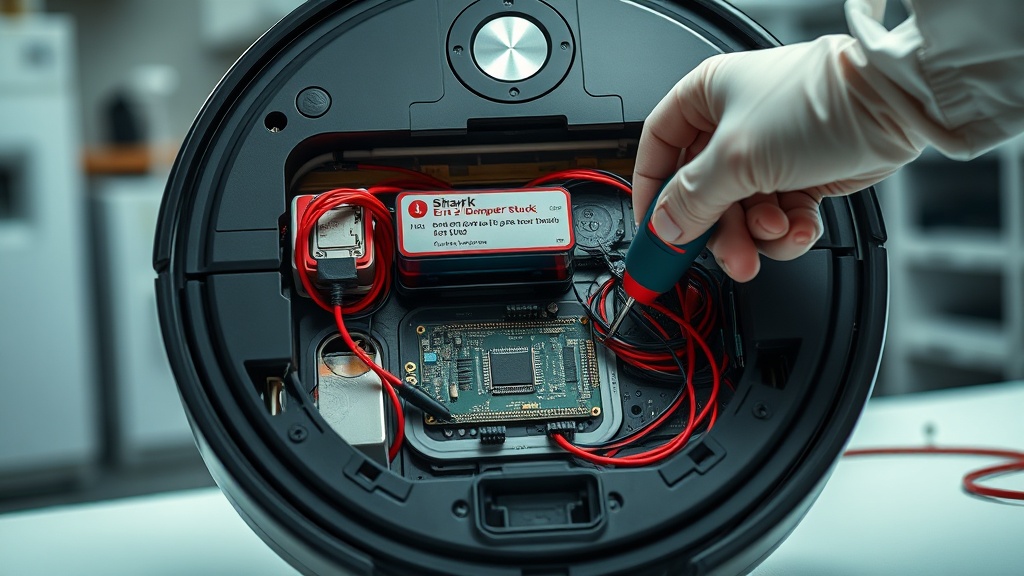
Shark IQ Error 2 occurs when the bumper is physically stuck or the internal springs lose tension, signaling a constant collision. To fix it, first clear any visible debris from the bumper edges. If the error persists, you must manually tap the bumper to release it or disassemble the front plate to realign the internal springs and sensors.
Common Causes of Bumper Errors
The primary cause is usually hair, dust, or small toys wedged into the narrow gap between the bumper and the main chassis. Over time, the metal springs inside the bumper can also lose their elasticity, preventing the bumper from “springing back” after a hit.
Additionally, if you have added aftermarket bumper guards or rubber strips, these can create friction against the frame. This friction prevents the sensor from registering that the bumper has returned to its neutral position.
[IMAGE_PLACEHOLDER]
Step-by-Step Shark IQ Robot Vacuum Error 2 Bumper Stuck Fix
Before starting any internal repairs, ensure your robot vacuum is powered off completely to avoid electrical shorts. Use a soft surface like a rug to prevent scratching the top cover of your device during the process.
| Step | Action | Tools Needed |
|---|---|---|
| 1 | External Cleaning: Wipe the bumper edges and sensor windows with a microfiber cloth to remove debris. | Microfiber Cloth |
| 2 | Manual Stress Test: Rapidly tap the bumper several times to see if it clicks and pops back out instantly. | None |
| 3 | Disassembly: Flip the robot and remove the screws (usually 8-10) holding the bottom plate and bumper cover. | Phillips Screwdriver |
| 4 | Spring Calibration: Inspect internal metal springs for tension and clear any hidden hair or grit from the sensor path. | Tweezers, Compressed Air |
If the bumper still feels “mushy” after cleaning, the internal springs may need to be slightly stretched to regain their original tension. Reassemble the unit carefully, ensuring no wires are pinched between the bumper and the frame.
Recommended Replacement Parts
Disclaimer: This section contains affiliate links. We may earn a commission at no extra cost to you.
Sometimes the internal components are too worn for a simple cleaning to suffice. If your bumper springs are snapped or the plastic clips are broken, replacing the bumper assembly is the most reliable long-term solution.
We recommend using genuine Shark replacement parts to ensure compatibility with the infrared sensors. Using third-party bumpers can sometimes lead to “Cliff Sensor” errors if the plastic transparency does not match the original specifications.
FAQ
Why does my Shark vacuum keep saying bumper stuck when nothing is there?
This often happens because of “ghost” signals from dirty cliff sensors or internal dust buildup near the bumper switches. Even if the outside looks clean, fine dust inside the mechanism can block the optical sensors from registering a “released” state.
Can I fix Error 2 without opening the vacuum?
Yes, you can often fix it by using a can of compressed air to blow out the gaps around the bumper. Forcefully but carefully tapping the bumper can also dislodge small pebbles or debris that are stuck deep inside the frame.
What if cleaning the bumper doesn’t work?
If cleaning and manual resetting fail, the issue might be a faulty microswitch on the motherboard. In this case, the robot requires a professional hardware repair or a motherboard replacement to restore sensor functionality.